Always wanted to have a go at glass etching but worried that it is one of those craft projects that will cost you a small fortune, take up a huge amount of time and get you unsatisfactory results?
This article will show you why that is not the case.
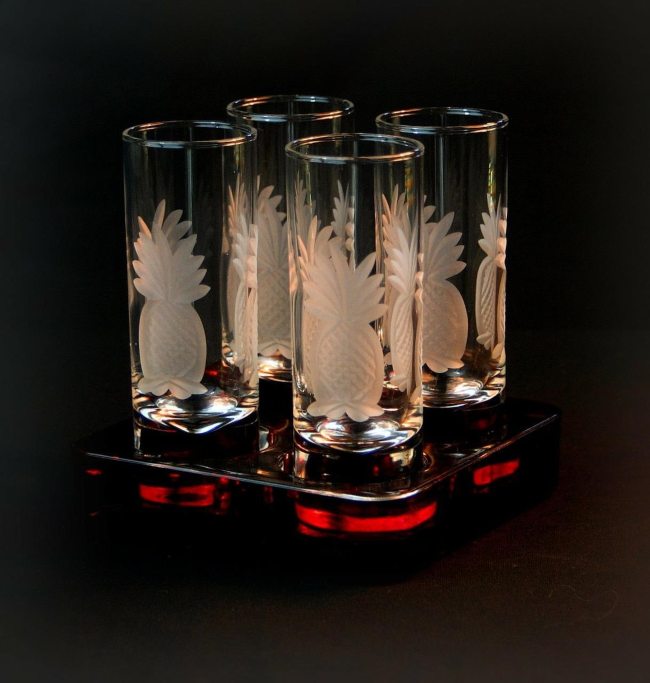
Glass etching can be quick and fun, and you can get beautiful results without a huge payout.
Discover why glass etching should be your next craft project, how you can get amazing results using stencils, what equipment you will need, each step you should take when etching glass, and what to do if it doesn’t go as planned!
Why Etch Glass?
There are so many reasons why etching glass is an excellent hobby and craft activity. You can personalise items, furnishings and fittings in your home. You can recycle all those pretty, but also pretty useless, jars you’ve hoarded over the years. You can create bespoke gifts for friends and family and you can unleash your creative side, which has so many benefits including stress relief, boosts self-esteem and increases brain activity (think of arts and crafts like going to the gym for your brain).
Equipment You Will Need
- Glass cleaner.
- Microfibre cloth.
- Glass item/s to be etched.
- Stencil/s.
- Masking tape/film.
- Rubber gloves.
- Paintbrush.
- Etching cream.
- Plastic square or an old gift/membership card.
- Bucket of water.
- Sponge.
- PH testing strip.
- Sodium Bicarbonate/Baking soda.
Steps To Follow When Etching Glass
- Gather together all of the above materials you need and if required protect any surfaces in case of spills.
- Put on the gloves.
- Ensure your glass item/s are clean, dry and dust/lint/fingerprint free.
- Place your stencil on the glass item and remove any air bubbles with the plastic square/gift card.
- Cover the rest of the glass with masking tape to avoid any markings when rinsing.
- Use the paintbrush to apply the etching cream ensuring you get cream onto the whole design.
- Leave for the time suggested by your particular make of etching cream – too long and it may eat through your stencil, too short and it may not take the design.
- Rinse in your bucket of water and dry with a cloth.
- If required dry and repeat the process (for a deeper etching).
- Neutralise the acid from the cream in the water with bicarbonate soda and test with the PH strip before tipping down the drain or following the manufacturer’s instructions for safe disposal.
- Remove the masking tape and stencil.
- Step back and admire your handy work!
- Ensure you thoroughly wash the glass item before use (it will be dishwasher safe).
Glass Etching Didn’t Turn Out As Planned?
You gathered all your materials and followed the steps but your glass etching didn’t turn out as you hoped it would. Don’t worry, as with all crafts and hobbies they take time to perfect.
However, if you are running out of time to create the perfect gift for someone and have no more time to perfect your technique, you could always consider getting a professional to do your glass etching for you.
At Furnells we have been etching and engraving glass for professional and personal occasions for over 40 years (so don’t feel bad if you didn’t master it on your first attempt) and we’d love to help you on this occasion (or any other one). So, just get in touch with us today and we’ll ensure your glassware is personalised perfectly.